Showing posts with label minor mods. Show all posts

Saturday, January 5, 2013

Mods for Iron Man (Neo-Classic Armor)


Ah, the armor variant a lot of people forgot about. 

It's already been 5 years since Iron Man 2, and I can still see remnants of the toyline in malls.
this one in particular really clogged hard.

Well it's one of my personal favorites, and after reading Doomquest and Legacy of Doom last new year's I went out and bought this dude again (I have 2 more).

One thing I could never accept though were the stupid shoulder joints they gave the figure. So I went and did a mod, which I think works out way better than my last 2 attempts.

It works on the same principle as the marvel legends version of this armor variant: the joint for the shoulder armor is placed on the shoulder itself, instead of the torso,

It's practical and it's remarkably simple too. 


The first step I did was to cut off the shoulder armor from its original joint, I glued down the remainder of that joint to the torso so it won't move around. Then I  drilled a 2mm hole into the middle of the shoulder joint and widened it with a ball-tipped grinder to accommodate the ball joint. 


Next was to install the actual ball joint (which I stole from another figure that didn't need them anymore) and bonded it to the shoulder armor with superglue and faith in a higher power.

It works wonders since the joint itself is a double ball-joint, and essentially there's a socket on the shoulder and on the underside of the armor so it's quite mobile. The result is that the arm can now move freely without the shoulder armor moving in an unnatural way, instead it follows the movement of the arm itself.


I guess the only thing left to do now is to clean the mod up a bit and repaint the figure better. If in any case you want to try this out but lack the joints, you can go find a 2mm diameter metal spring instead.

EDIT: Finished the repaint lol


Sunday, December 9, 2012

Diane


Yay?

Man, I was hoping to get the Microforce Command Microman this month but the shop I ordered from gave me the wrong figure. Was kinda disappointed at first, no actually frustrated that they mixed it up, but then again it's not like I wasn't going to get this figure at some point. I just wanted to get more micromen because i have a lot of microladies already. 


In-hand she's not bad, actually she's tons of fun. the plastic feels solid and won't break with a bad glance, the weapons and gear all fit and store snugly on her person, and it's a good choice of weapons too (bazooka, assault rifle and combat knife) . I especially like details like how she can switch cartridges on her assault rifle and store them. Probably the only thing missing would be a pistol.


Went ahead and painted her face like I do with all my microforce figures, and I'm surprised by how pretty the face is underneath when I painted it, all that chrome kinda obscured it but now it's out in the open, and it's a very nice sculpt to me. 


Thursday, November 29, 2012

Head Start!


Finally putting that spare Den-O to use.

So on my visit to the local Japanese surplus store, (same store I bought a loose MRS Den-O) I was able to find and buy a few Soul of Hyper Figuration statues, one of them was Den-O. 


Turns out the statue is the perfect size for the MRS body and it has the compound eye look that I want, so I went ahead and chopped it off for transferring.


Now normally that would be enough, but I decided to tweak a few things on the MRS just slightly, like the shoulder armor and a bit of the belt. What I plan to do with this is to completely repaint it to look a bit more accurate, something that I'll base on the tiny statue since its paintjob is so pretty, but that's for next week because we'll be spending the weekend out of town. 
Now I mentioned I bought more than one statue, so which one was the other one?


.
.
.
.
.
.
.
.
.
.
.
.


Kuuga. It ended up a tad more straightforward. 


Sunday, July 8, 2012

Jubilee Repairs

I got a Marvel Universe Jubilee as a birthday gift from a friend (thanks Kyle! ), and I was pretty stoked. But as with any Hasbro toy you'll never get everything you want in a figure. The flaws this one had were the ludicrously long legs, and the derpy wall-eyed head. So I decided to fix the legs first. 


You need to cut below the knee/boot swivels first, and this is mostly guesswork but do try to leave some space when you cut so you won't risk damaging the leg or ankle joint. 


Next take a pin vise (2.5mm) and drill in the middle of the cut calf stump, be careful as again this is the spot right below the boot cut joint's peg is located. 


Then drill into the middle of the cut ankle/foot, be mindful of the ankle rocker joint when you drill.


Next, cut a length of plastic tube (from a sprue), making sure it's the exact diameter as the holes you drilled. 

 Glue the new peg into the leg. This will serve as structural support when you glue the other half back on.


When you glue both parts together you will end up with this.  At this point you have two options: you can carve away at the upper calf until it matches the lower part then sand smooth, or you can choose to be more careful and progressively wetsand (100-300-600-1200 grit) the parts until they are even. 


Either way you will end up sanding down the leg part until it all results to a smooth shape


At this point you should just smooth it all out with 1200-2000 grit sandpaper to bring back the even, factory texture and lightly paint the parts in flat black. And you're done!


The new modifications are immediately apperent. 


now her height is much better.

Thursday, June 7, 2012

More fun with Electrical Tape


Okay, so after asking around at JoeCustoms.com, someone suggested using electrical tape with the adhesive removed to make slings and straps. worked like a charm!


Went and replaced the bomb kit straps of Firefly too. 


Was too lazy to make a full scabbard so I got inventive. 


Single-Point slings for my alley vipers.


Adjustable double point sling for Duke...


...And Lady Jaye. 

Wednesday, May 30, 2012

All Because of A Broken Peg

Ah, accidents provide me a good motivation to experiment.


You see, today I got the 25th "Comic Pack" Firefly figure (the one that comes with the Devil's Due styled Stormshadow) and found out that the peg connecting his backpack was snapped off during shipment. Well the seller was nice enough to hook me up with some other parts and custom fodder, but this got me to thinking. You see I like his gear, and I want to keep it but how do I repair the damage?

My options were to buy another Firefly (which, really I'll friggin do before the end of the month :P ), repair the peg, or try something different.


I tried doing "soft-goods" straps for the backpack, and consequently, the HKMP5. 

The tactical single point sling was easy enough if not a bit cumbersome looking but I enjoyed it nonetheless. It's functional, and looks decent on Firefly plus the elastic garter means I can have it tight on the figure when he wears it and it won't come off.  This actually served as the practice round for something more complicated:


The straps to his sabotage kit. Armed only with a length of leather string, some superglue and a bag of tiny chain/earring links I set about making the straps.


I wanted to actually have the straps be adjustable and it does feature a working buckle system that fastens it onto the figure. And the buckles actually do go up and down on the shoulder straps, so in theory, it can be worn on almost any Joe figure.


I think it worked well enough on the Viper, at least. Now he can go on his own Sabo-Tours!


I definitely had fun doing this, and I think I'll be refining and utilizing this feature on my next few customs. Hell, it beats having to hunt down a figure with a side holster already molded into their legs. Now I can make my own.

Harnesses, Webgear, Slings, Holsters... The possibilities are endless.


Friday, April 13, 2012

Retouchings.

So I bought this 25th Anniversary Baroness figure and less than thirty minutes after I bought it the face really bothered me (for reference, click here.), so the first thing I did as soon as I got home was fix the face up, specifically her eyes, and gave the "glasses" a blue tint, to give the effect of it actually having lenses. 


Then afterwards, I shaved her crotch (lol) so that she could be able to sit the hell down. 
 I'm kinda satisfied with it now, but I'm still considering hunting down the second version of her, the one that comes with straight hair. 
Anyway, enjoy the rest of these pic I took of Baroness with Destro. 


Monday, October 17, 2011

the things you find while taking a walk.

I can't think. I really can't think and this is a bad start for the week. I felt a little terrible getting up today and for the rest of the day I felt a bit bogged down. So I decided to take a walk, but that didn't help and I came home with this:

Bought it on the novelty of finding a Figma in a bargain bin (and for just 250php/ $5 too!) , really.  Babby's first--incomplete--Figma. 

Stuff I assume to be missing: part of the hair, her hair bun, some alternate hands, an alternate face and a stand (duh).  Well it's neat but i'm giving it to a friend by the end of the week, I figure it's going to a good home.  Now here's another thing that came around last Saturday, but pushed back posting about it until I could  address her little problem:

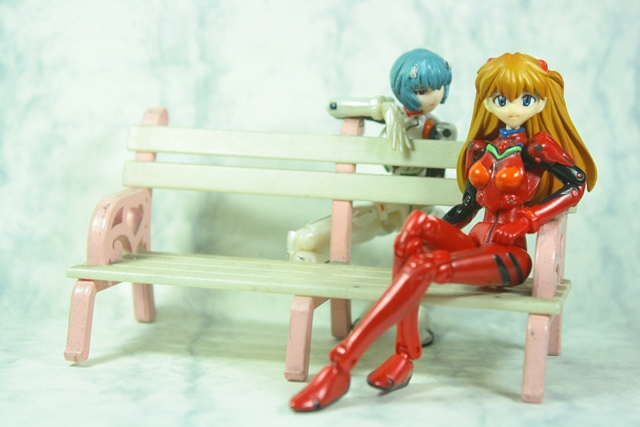
Meet Microlady Asuka.
 She's missing part of her hair.

Now if I hadn't  used the hair from the other Asuka head I owned there would be no problem but unfortunately it was used for a custom. So I thought of another solution that I applied on Chun-Li. Easier said than done right? well, almost. I couldn't find a head on hand that was the right size and when I did it had a hat (now that I think about it, Imma' go back for it). My headache was getting worse so I went for the one I thought would be the closest to that size:

And it still ended up a tad big.

This new head, it fits but seems to make the figure look more caricatured. Well the good news is that there are likely to be more appropriately sized sculpts out there and Evangelion shit is a dime a dozen because it's almost always lumped in with Naruto and One piece or Bleach crap in the flea markets so I could easily resell the gashapon figure the head originally came from. 

For now though, I guess it will have to do. 

Well now, after writing all that down... I still  feel under the weather. Bah! I think I'll lie down for a bit.


Saturday, October 8, 2011

fixing Garren shoulders

Man.  The redesigns for the Kamen Rider Blade suits into SIC Kiwami Tamashii figures really lacks a good range of movement in the shoulders. Anyway Garren's didn't snap off like Blade's did but I wanted to be safe about it and did a mod to them anyway:


so what I did in the first pic was basically:
  1. Cut off the ball joint post.
  2. Drill a 1mm hole in its place.
  3. Drill another hole where the ball joint would have mounted.
  4. Took some metal wire (the ones that were used to secure Garren in the package) and cut a small length of it, twisting the two ends of the wire into a plug shape before melting the plastic around it and shaping it into a peg.
  5. I glued one end into the hole in the shoulder armor.
  6. Then attached the other end to the hole in the main body.


And here's what it looks like done. Almost looks like nothing was done to the shoulders at all...


...Until you move the arms forward (which the original figure couldn't do before).


You can even have him aim upwards now.

you can apply the same mod to Blade as an alternative to the ball joint method I posted  before. it's cleaner and you don't have to look for the materials beyond what is already included with your figure. 
 Hope this helps you SIC kiwami tamashii collectors out there!