Showing posts with label tutorials. Show all posts

Friday, March 28, 2014

Friday Night Mods!

Continuing with the modifications that need to be done on the Asshimar kit, I've decided to address a few of the most crucial- loose fitting parts.


okay, since this kit had to conform with a standard set of polycaps and still needed to do a full transformation, a lot of the non-essential moving joints on this kit are done via plastic-on-plastic friction between parts. Now over time this will grind down the joint with every repositioning one may do, as evidenced by plastic dust accumulating in the socket (this was before bandai learned to use glossier plastics for these sorts of joints). So this particular entry shows some methods I tried to address this issue.


Sunday, February 2, 2014

hack and slash


Okay, one of the essential parts to pay attention to when working on something like the metal slug gashapon set is the figures. You can paint up the vehicles all nice and all but the figures also need that sort of attention.

That being said, it's pretty hard to paint them up right when they're one solid piece of PVC (or rather several parts firmly held together by glue).

If I wanted to paint the figures entirely, meaning ALL the little crevices and gaps, I can't accomplish that by just painting them as-is, or rather you can but it'll be way to difficult and nerve-wracking for your hands.

What could you do?

Tuesday, August 20, 2013

Let's Paint!- mini 1/144 scaled figure


Hello! Since a friend of mine requested help with this aspect of painting and since I also don't have anywhere to go thanks to the weather, I decided to make this little follow-along on how I paint very tiny 1/144 scaled figures. Our test subject is this 1/144 Sayla Mass from the Bandai Builder Parts series.

Monday, June 3, 2013

Beginner's Hex Camo follow-along.

Hi! I've been trying out a new paint scheme recently while working on the Dark Hound and I thought that I should document the process for people who may be interested. It's a fairly simple spray pattern that can be done either via airbrush or spraycan, though I opted for the former since it's what I have on hand.

To start off, you'll need the following:


Left: Blue (22), Right: Gray (24)
Since I planned on using an analogous color scheme for the camo I went with two contrasting shades of the same color, in this case a light gray (Gundam Color Gray 24) and a dark gray (Gundam Color Blue 22)


Useful for making detailing out of pla plate as well. 

Next, to make the actual hexagons I utilized this plastic template. 


And then of course the Masking tape. you can use painter's tape or tamiya tape for better results. Again, i'm just working with what I got on hand.

Now the tedious work begins. First, before painting you should select the size of the hexagon "cells" you'll be using, and repeatedly draw it with a mechanical pencil onto some masking tape strips you laid out. How many you'll need is up to your preference. This is probably the most boring part of the entire process but absolutely necessary. 


You can see at which point I just gave up. 


Then you need to prep the piece you'll work on. this involves washing, and some cleaning up with putty and sandpaper if it comes to it. 


Now after priming it, you then need to spray the lighter color on first, as in the case for this demonstration, since the cells will stick out more on the  darker second coat (but of course if you want to do it in the reverse it's your call).


Now the fun part. Here is where you cut out the cells you drew earlier with the template and begin to stick them onto the part. It's important to keep some spacing between the cells, this helps you make the placement look more organized even though you're going for a more randomized pattern and also makes your placement look more natural. It also helps reduce the visibility of the uneven sides of the cut cells (cutting manually means that getting the same, evenly sided cells is very difficult to achieve. In reality you will only end up with cells that are 80% the same.). 


Afterwards, you spray on the next darker coat. Once dry you'll then peel off the cells to reveal the Hex camo pattern underneath. 


This applies to a lot of colors, even red. I find an analogous color scheme looks better than a heavily contrasting one, and looks better on the model as a design choice. Though as actual camouflage it won't actually work too well. 


And that's about it! Remember to keep experimenting and have fun, and if you're having any questions or suggestions feel free to drop me a line here.

I''ll be finishing up the Dark Hound Crossbone colors soon enough! 

Thursday, February 14, 2013

Oyumaru Troubleshooting.


Recently someone messaged me on facebook asking if using oyumaru for molding around an existing face sculpt would damage the paint.  I replied that it was relatively safe for painted parts and I decided to test that theory out. First of all I needed some assistants.


And of course, the Oyumaru.

Generally speaking Oyumaru is a sort of clay compound that becomes malleable with the introduction of heat. Interestingly enough, when the heat factor is removed the clay-like material retains it shape rather rigidly, resisting any deformations until it's heated again. as such it's an excellent material for 1-part molds, though some modellers have had success with 2-part molds themselves.

Now that that's out of the way we can mo--


...Stop it you two.


Okay, now you'll need hot water.


Dip the Oyumaru into the hot water and wait for it to soften. You can hasten the process by putting the water and oyumaru into a microwaveable container and heating it in the microwave for 1 minute and 30 seconds.


that should make it soft enough to knead into shape. Now to mold the original part you'll need to be very careful to get all the contours around the part. This is somewhat difficult to do with anything that isn't a flat shape, but we're too far into this post to let that in the way of showcasing comedic situations now, aren't we?


Right, ladies?


*PLOP* 


Let the oyumaru cool on its own (or run it under cold tap water to harden it) before removing the original part. Once the part is removed you'll have a useable one-part mold, but in this case it won't replicate the entirety of the part, only the front.

There is zero damage to the object you'll replicate so we should end this post here, but I wanna tackle the other part of the process.

Now the recasting material comes next but I lack any usable resin at the moment so we'll have to MacGyver our way on this.


Welp. Beggars can't be choosers.


whatever material you choose, make sure to mix it thoroughly so it sets in the proper way. For molds like this it's always recommended you use pour-able materials in order to get the best results.

Once the material sets it's just a matter of removing it from the mold. If you intend to make multiple copies you should be very careful in extracting the recast from the mold. Ideally, you will have designed the mold in a way that makes it easy for you.

If not, then simply re-heat the oyumaru again and peel the softened mold from the recast.


So did it work?


NOPE.

Here's why:

  1. Recasting material: In this case we tried material that wasn't appropriate for the mold design, that's something to consider. the effectiveness of the recast relies on this. Polyester Putty which is in the form of a paste has been used for molds like this by other modelers though it usually dealt with parts of flatter contours and hence easier to push into place. though you can succeed in face sculpt replication with polyputty over repeated tries. This tutorial was only a one-off thing.
  2. Mold design: We essentially made a pour mold for the piece what's more is the small entrance for the recasting material makes it difficult to get into nooks and crannies. In instances like these it's best to design the mold in two parts, so you replicate the front and back halves of the piece as separate parts and just assemble them into a single piece afterwards.

    There are many ways to go around this method of parts replication and success is 50/50. don't get discouraged by failing the first time because that's part of the process of refining your approach.

    I've had marginal success in replicating other things from oyumaru, such as this leg armor part for the Liger Zero:


See how that's a two-part mold above, and the material was epoxy resin.


The trick here is to study the object you're recasting before going forward, and since oyumaru is reusable with just a dip in hot water, you can keep trying without having to worry about wasting too much material.

I'll do a proper face replicating tutorial in the future but for now, I've filled my quota for Shinki abuse today.


Friday, February 1, 2013

Bug Eyes


Hi! Stumbled upon a relatively easy way of making bug eyes for my kamen riders, and I'm fairly new at it though I thought this might be of interest to I took time to document the process.


Okay first you have this head sculpt, with the eye sockets drilled in, this is mainly to center the eyes for setting later.


Next you put some epoxy putty in the sockets, just enough to fill it and to jut out slightly from the hole. Make sure you make the shapes the same.


Then, using a dental tool or a hobby knife, make a criss-cross pattern on the eyes, this serves to give the compound eye look to the final product.


When the putty sets hard, paint the eyes silver, this is so they reflect any light that hits them, and makes the finished eyes stand out more. 


You'll need some fast setting clear epoxy for the next step, mix a tiny batch up and wait for around a minute or so before using it on the eyes so it won't run.


With the dental tool or a toothpick, gently dab a drop, roughly the size of the eye socket on the criss-cross pattern use the tool/toothpick to position the drop into the right shape while it's still fairly fluid.


once you get it the way you want, simply paint it up with the clear acrylic colors of your choosing and you're done! this method also works for henshin belt orbs or monster type eyes as well, as always, practice makes perfect! 

Wednesday, October 17, 2012

handy little helpers.

Left: microlady leg rig. Right: microlady arm rig.


made these micro-rigs the other day to help me disassemble/assemble Microlady parts (mainly those held together by pins). Made these after realizing that doing the process in my old way spent too much time and did too much damage to my work area, so I built these things to hold the parts steady while I work.


The process is basically wedging the part into the holding rig that was designed to fit it tightly (2) and using a small screw bit and a hammer to extract the pins into the catcher holes embedded at the bottom of the rig (3)


With the rigs, there's less chance of breakage on the pins, and no damage to my desk or fingers, lol. 


Thursday, September 20, 2012

On Sculpting and Parts Making

Copy-pasting a post I made on my facebook pertaining to how I sculpt:

1. Tools and general tips:


Sculpting tools. the ones I use a lot are mostly the hand-made ones lol

A. Hobby knife for cutting and making sharp/even edges.

B. BBQ Sticks with flat sanded edges for general shaping and manipulating the epoxy putty

C. Engraving tools to smoothen or add indents on surfaces and make raised designs.


General tips for epoxy sculpting:

use powder to keep the putty from sticking to your hands or tools

general shaping can be done 5-10 minutes after putty has been mixed and applied

for refining shapes or making designs wait until the putty becomes a little firmer and is no longer sticky.

for harder edges and sharper lines, you can make them when the putty is really firm and no longer malleable but not rock hard. Use the knife to carve sharp edges from the putty.

You can do repairs on your sculpt or make it sharper after it has fully set, by using strips of sandpaper to sand down the sculpt into the shape or texture you want.

any questions? throw them at me I'll try my best to answer them.

Tuesday, January 3, 2012

S.I.C.Kuuga Modification part 1 (Elbows)

New mod for the new year.

The goal of this tutorial is to replace the normal ball-joint elbow of the figure with a ball swiveljoint.Before we begin this modification let me briefly list down the components for this particular tutorial: pictured here is the upper and lower arms of Kuuga, and a 6mm revoljoint (but any brand would do, since ball swivel joint sets are also sold by other companies like Yellow Submarine or Hobbybase. If this is the case choose the joints that best matches the original color of the limb). Keep in mind that most joints of this design have a 3mm diameter peg.

Next are the tools, the main ones you'll need is a 1 to 1.5mm pin vise, a 3mm pin vise and optionally a hobby knife.

Then long nose pliers and optionally a side cutter


the first step is to use the long nose pliers to pry off the previous ball joint. Ideally the joint would come off in one piece but if the bond of the adhesive is too strong...


...The joint breaks off, leaving a large chunk stuck in the hole.


Here is where you might need to clean up the cut joint using a side cutter to trim off the excess plastic and a hobby knife to make sure the surface is flat.


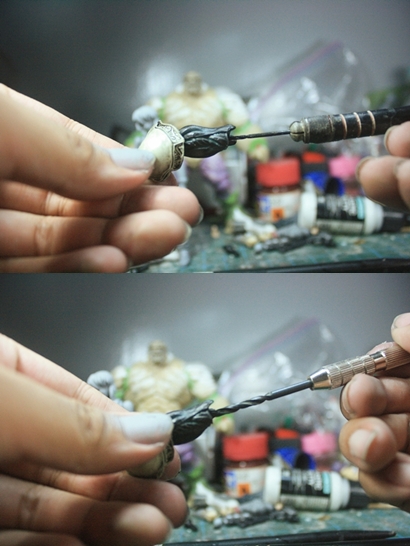
Then next main step is to drill a guide hole in the middle of where the old joint was using the 1mm drillbit and then progressing to the 3mm bit for the main peg hole.


Repeat the process of the previous picture to the forearm, making sure to drill in the MIDDLE of the socket.

All that would be left is the assembly of the arm. Ideally you should drill deep enough to conceal the pegs of the ball-swivel joint.


This would be the result of the mod to the arms. Next time we'll deal with adding the same kind of articulation to the knees.
Stick around for part 2.