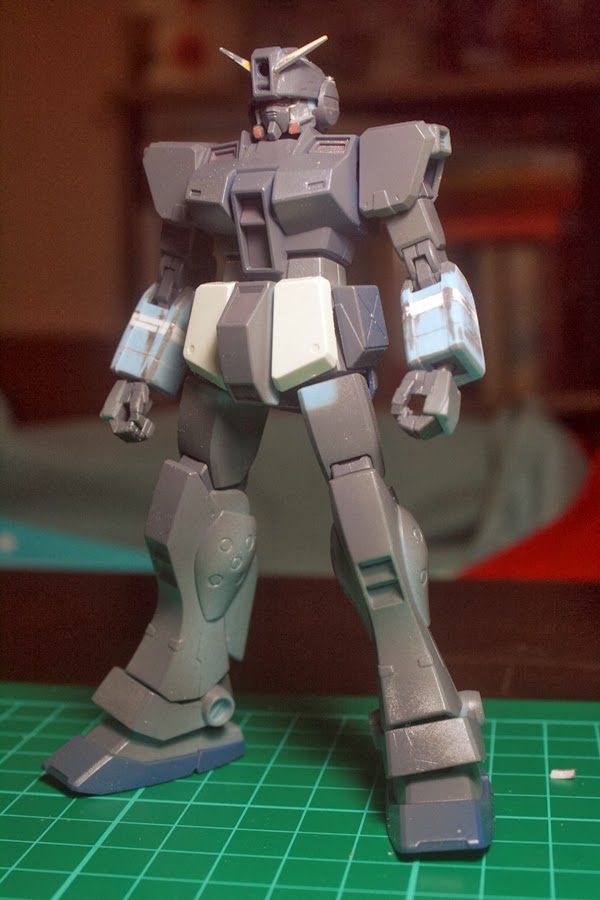
So sorry for the lack of updates, but I decided to pop in to make a quick follow-along project.
Monday, September 22, 2014
Sunday, August 10, 2014
Things went quiet for a while
Thursday, July 3, 2014
Double post!
(insert shit here)

I finished this recently for a Group build involving the Gerbera Tetra.
I didn't have the Bandai one on-hand but they did allow me to use this Dragon Momoko one I got last year. I decided to give mine Cima's personal Colors. The results look okay to me and I think I can improve it on the Bandai one if given the chance, lol.
I finished this recently for a Group build involving the Gerbera Tetra.
I didn't have the Bandai one on-hand but they did allow me to use this Dragon Momoko one I got last year. I decided to give mine Cima's personal Colors. The results look okay to me and I think I can improve it on the Bandai one if given the chance, lol.
Labels:
Cima Garahau,
dragon momoko,
gerbera tetra,
Gunpla
Friday, June 13, 2014
Muffled Transmissions,
It feels like forever since I last posted something (or just less than a month lol), but hey, yeah. Posting this just so that one person other than me who reads this blog knows it ain't dead.
I've been working on some projects still, since last time...
Labels:
1/144 scale,
diorama,
Gunpla,
HGUC,
work in progress
Monday, May 19, 2014
Just a small victory.
The 2014 Gundam Model Kit Contest concluded today, and I'm happy to have taken home something for my efforts.
Wednesday, May 7, 2014
All Set
Just finished my entries today, with some days to spare too. I spent yesterday picking up the washes I needed to complete the builds, at my friend and fellow hobbyist Daryl's house. Ended up hanging around and waiting for other builders, the very talented Dennis Cruz and DS paints co-owner and modeler Chester Uy. Notable stuff I learned while there was the application of the oil dot filter and a brush on filter, both of which I am pretty eager to try on future works (like my MG Gundam Ver.Ka).
Dennis also picked up some washes for his entry, and Chester meanwhile was working on his entry for our Noob Group Build on the way home (around 10 in the evening) we ran into Voltaire Gaviola who was also going to get paint for finishing his own entry for GMKC 2014. I immediately went to work on mine, completing the panel wash for my V-gundam entry. Earlier this morning, I finished up on the panel wash for my Thunderbolt Full-Armor, which went on rather nicely. I'll upload full galleries after GMKC concludes, but for now, here's some black and white pics.

Dennis also picked up some washes for his entry, and Chester meanwhile was working on his entry for our Noob Group Build on the way home (around 10 in the evening) we ran into Voltaire Gaviola who was also going to get paint for finishing his own entry for GMKC 2014. I immediately went to work on mine, completing the panel wash for my V-gundam entry. Earlier this morning, I finished up on the panel wash for my Thunderbolt Full-Armor, which went on rather nicely. I'll upload full galleries after GMKC concludes, but for now, here's some black and white pics.
Monday, April 28, 2014
Sunday, April 27, 2014
today was awesome.
crap, I just got home a while ago after picking up my entries from Mechapinoy's SaD (Shine and Dirt) Invitational contest.
Tuesday, April 1, 2014
Nothing Much to report
This weekend has been fruitful for some of my gundam projects of late.
Managed to finish the first of four Victory Gundam kits I've bought, in a two-tone variaton of the standard colors. Now this frees me up to start another one in more military colors with a bit more detail in some areas.
Friday, March 28, 2014
Friday Night Mods!
Continuing with the modifications that need to be done on the Asshimar kit, I've decided to address a few of the most crucial- loose fitting parts.
okay, since this kit had to conform with a standard set of polycaps and still needed to do a full transformation, a lot of the non-essential moving joints on this kit are done via plastic-on-plastic friction between parts. Now over time this will grind down the joint with every repositioning one may do, as evidenced by plastic dust accumulating in the socket (this was before bandai learned to use glossier plastics for these sorts of joints). So this particular entry shows some methods I tried to address this issue.
Labels:
1/144 scale,
Asshimar,
Gunpla,
HGUC,
tutorials,
work in progress,
Zeta Gundam
Thursday, March 27, 2014
Flying bagels!
Managed to get a second-hand Asshimar kit today from a friend, it was a little bit aged and had some loose fit in a few parts so I worked on it a bit.
Tuesday, March 25, 2014
A very busy month.
I forgot this thing existed again, lol. Seems I've left this place quiet for over a month. I have been busy though, I went back to making gunpla this past month and finished/started/stalled on some projects. I still need to do a full gallery for each but here's the list of things so far:
Wednesday, February 26, 2014
Monday, February 17, 2014
Saturday, February 15, 2014
Touchdown!
Been busy for the past few weeks, and I probably have a few finished stuff begging for some photo galleries (The Slug Flyer and Eri being the most recent), but for today though I got a very special package.
They arrived!
And they blew a massive hole in my wallet. But I can definitely say Pit-Road kits are so worth the extra bucks I shelled out.
Labels:
1/144 scale,
J35 0 Draken,
PAK-FA,
Pit-Road,
Plamo
Tuesday, February 4, 2014
Monday, February 3, 2014
PROJECT SLUG PART 1: It Begins
Sunday, February 2, 2014
hack and slash
Okay, one of the essential parts to pay attention to when working on something like the metal slug gashapon set is the figures. You can paint up the vehicles all nice and all but the figures also need that sort of attention.
That being said, it's pretty hard to paint them up right when they're one solid piece of PVC (or rather several parts firmly held together by glue).
If I wanted to paint the figures entirely, meaning ALL the little crevices and gaps, I can't accomplish that by just painting them as-is, or rather you can but it'll be way to difficult and nerve-wracking for your hands.
What could you do?
Labels:
metal slug,
modifications,
tutorials,
work in progress
Subscribe to:
Posts (Atom)